Verifying PayPal Account is one of the most important steps you need to complete in order to start using PayPal service without any restrictions.
What Does a Verified Account Mean?
A verified PayPal user enjoys the following benefits:
- A verified PayPal account is more credible to buyers
- A verified PayPal account can send and receive any amount of money
- A verified account get PayPal seller protection
Although for Indian PayPal users some of the above features aren’t applicable due to the restrictions imposed by the RBI, getting your PayPal account verified still makes a lot of sense.
Creating a PayPal Account with Debit Card
Before verifying your PayPal account you need to create a PayPal account in the first place. The procedure of creating a PayPal account with debit card has already been discussed on this blog already. So, I’m not going into those details in this guide.
After the PayPal account is created, you will receive a notification from PayPal which asks you to verify the PayPal account. The message will look like below:
Your PayPal Account is Unverified
Typically, PayPal will send you two small deposits to your bank account.
It usually takes 2-3 business days for the said deposits to be credited to your account.
All you need to do is log in to your PayPal account and enter the amounts received within the given boxes, and click on the verify button.
Sounds pretty straightforward, right?
However, it might be tricky for some PayPal users in India.
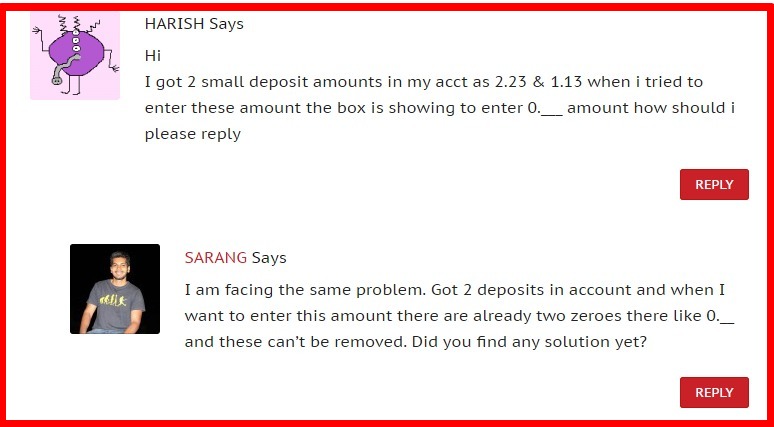
Take a look at some of the comments below:
Fixing Issues with Confirming Bank Account on PayPal
Ever since PayPal has rolled out its brand new sleek website, many PayPal users have reported a strange problem with regards to confirming their bank account on PayPal.
Remember, this problem is not extremely prevalent, but some PayPal users have reported this problem.
So What is the Problem?
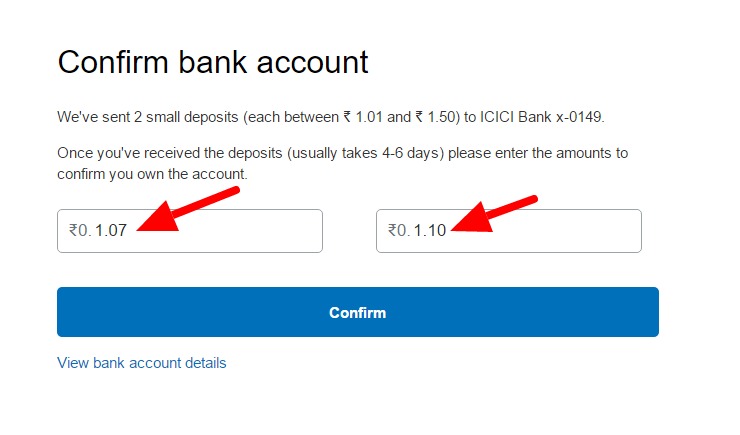
When you try to remove the zero’s in the boxes (see pic below) before entering the two amounts, PayPal won’t let you do that.
Strange, yes?
Thankfully, there’s a work around it, and it takes a just a few minutes to get this done and confirm your bank account with PayPal.
To make it easy to understand, I’m sharing some screenshots below:
Step #1: Login to your PayPal Account and click on the Confirm Bank Account option (as shown below). Chances are you will find two zero’s that you cannot remove.

Step #2: If you enter the amounts in the boxes, they will appear something like this. Kind of frustrating, isn’t it? You’re already banging your head on the laptop screen in frustration, but don’t give up just yet!

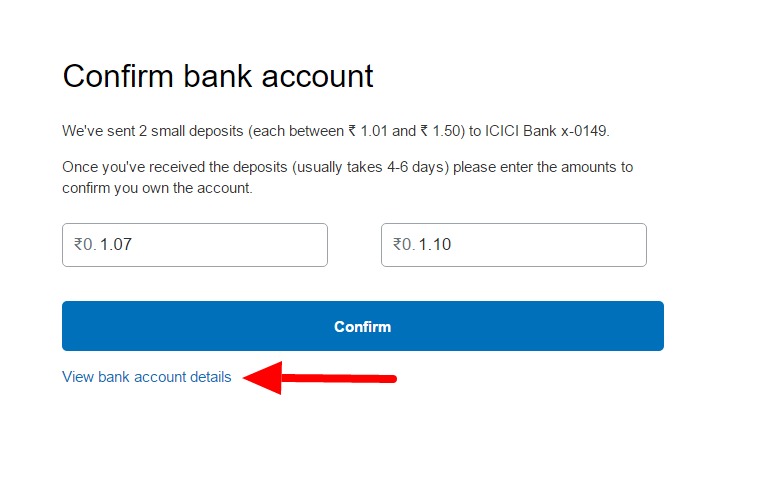
Step #3: Look below the Confirm button – what do you see? Yes, View bank account details. Click on that link. I know you’re sensing a solution there, already. But wait, it’s just a few more steps away.
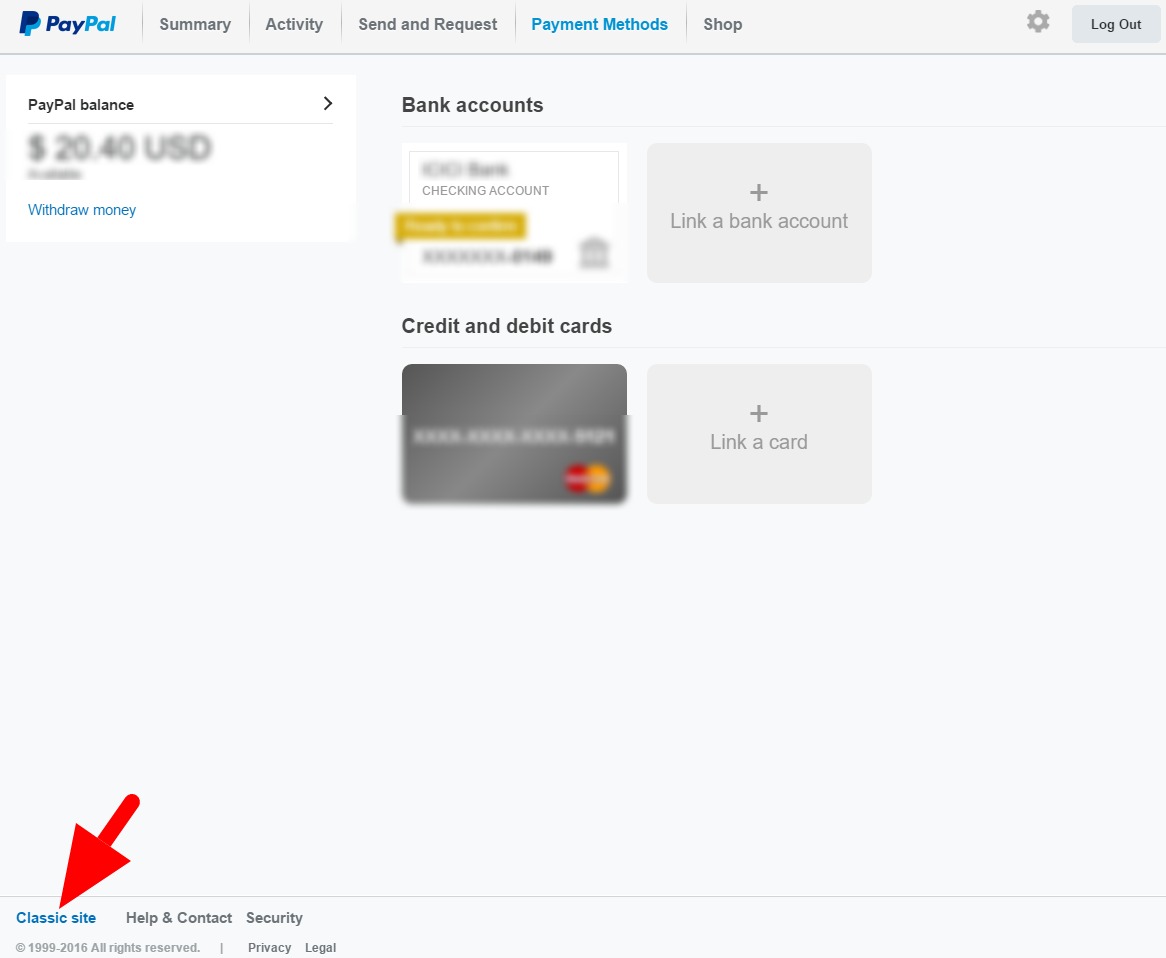
Step #4: The link in the previous step will lead you to the following page where you can Link a bank account or new card. But you need to look below those options. Look at the “Classic Site” option in the footer. Yes, that’s the bad boy. Click on that.
Step #5: You can see the good old PayPal of the yesteryear in all its glory, can you? But your PayPal account is still unverified, right? Look at the Bank accounts option and click on the Unconfirmed button with a red flag. Click on that link.
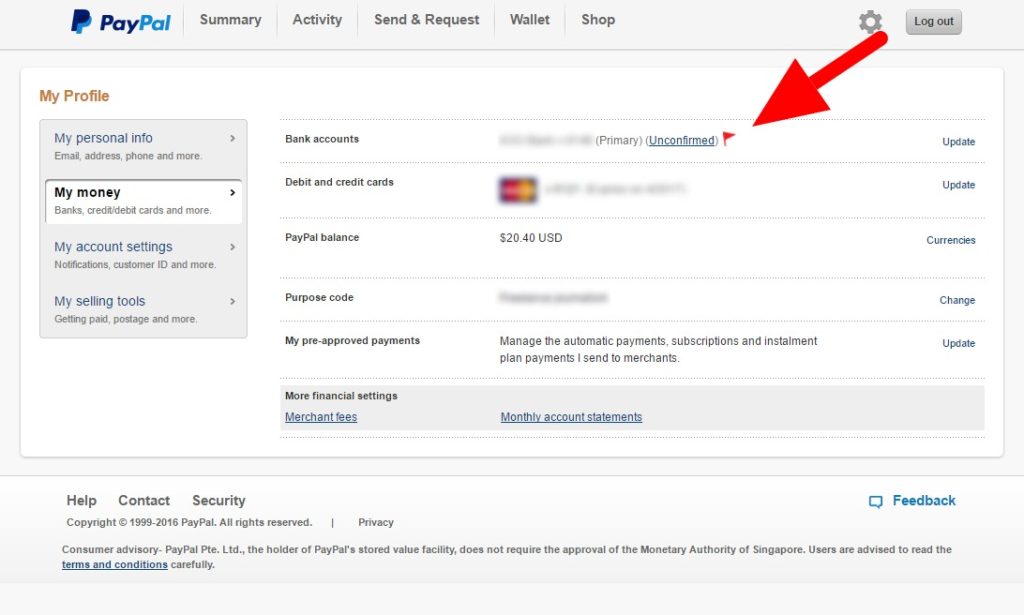
Step #6: Voila! You’re on the Confirm your bank account page showing boxes with no zero’s. Awesomeness!
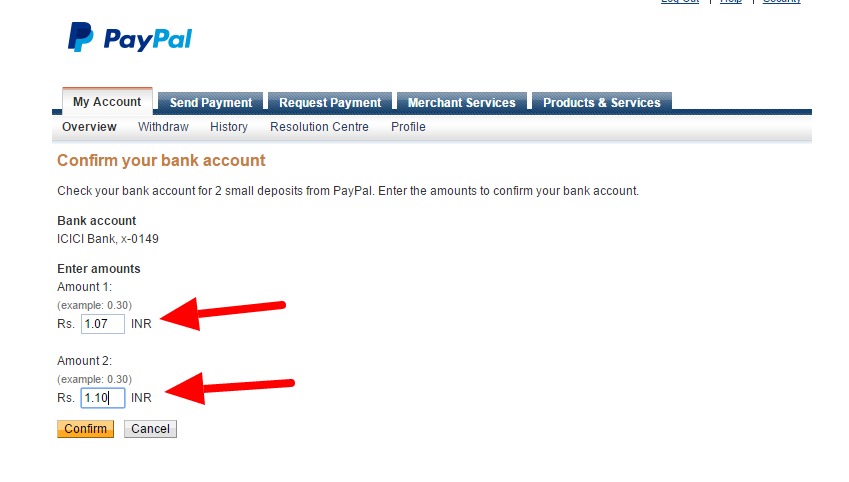
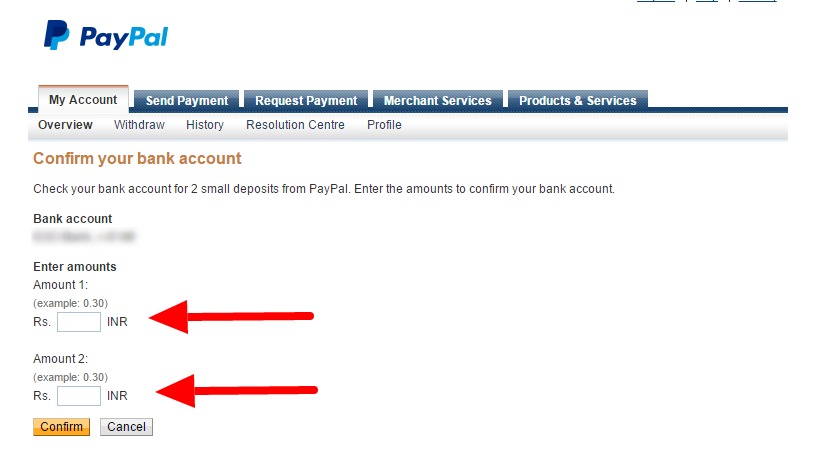 Step #7: Enter the deposited amounts you received from PayPal. Click Confirm. That’s it! You’re done!
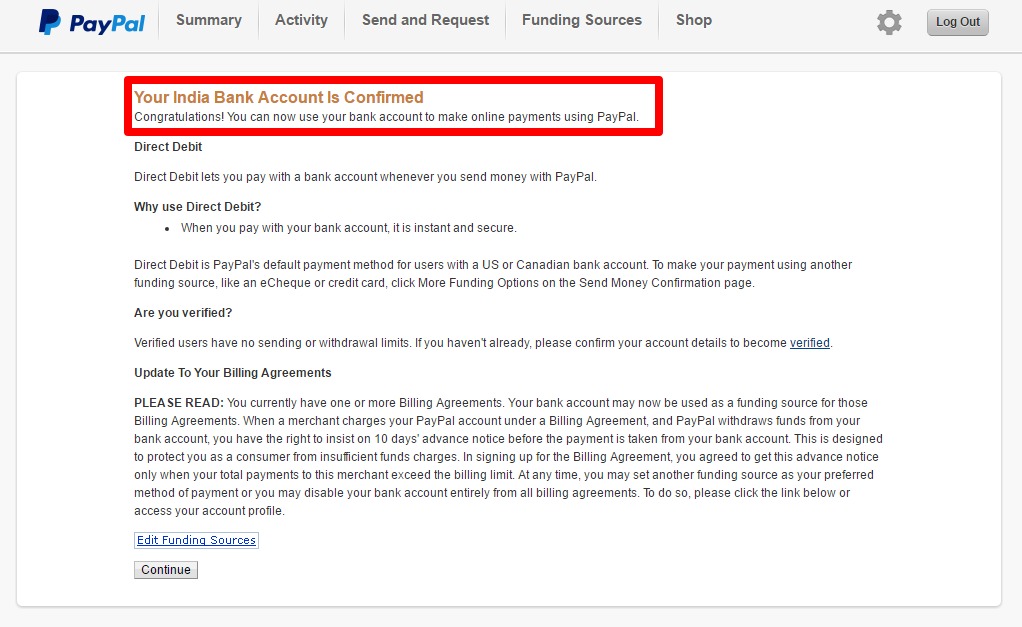
Step#8: Congratulations! Your India Bank Account is Confirmed.
Pat yourself on the back or share this guide to save your fellow Indian PayPal users from utter frustration.
Really, they will thank you for this act of kindness!
thanks for great information…